Italian Tiramisu - Original Recipe and Variations | Complete Guide 2025

Tiramisu.it

The art of the world's most beloved Italian dessert

History and Tradition of Tiramisu

A journey through 50 years of Italian gastronomic history

Tiramisu originated in the 1970s in the Veneto region, specifically in Treviso, at the restaurant 'Le Beccherie'. The creation is attributed to pastry chef Roberto Linguanotto and owner Alba Campeol, who wanted to create an energising and refined dessert.

The name 'Tiramisu' derives from the Venetian dialect 'tireme sù', which literally means 'pick me up', referring to the energising properties provided by coffee, sugar and eggs. A dessert originally conceived as a restorative.

From Veneto, the recipe spread first throughout Northern Italy, then across the entire peninsula, until it conquered the whole world. Today it's the most requested Italian dessert in restaurants worldwide, with over 5,000 registered variations.

Video Tutorial: The Perfect Recipe with Laura Rossi

Follow step by step the preparation of traditional tiramisu

Our expert pastry chef Laura Rossi guides you through all the steps to create a perfect tiramisu. In this video you'll discover all the tricks of the trade and the secrets to achieve the ideal consistency.

Watch the complete video to not miss any details!

Ingredients for the Perfect Tiramisu

Serves 8 - Preparation time: 30 minutes + 4 hours chilling

The quality of ingredients is crucial for an excellent result

Base Ingredients:

  • 500g Mascarpone - fresh daily, room temperature
  • 4 large eggs - very fresh, category A, room temperature
  • 100g Caster sugar - extra fine for better dissolution
  • 300g Ladyfingers - or 250g Pavesini for a more delicate version

For the Coffee Soak:

  • 300ml Espresso - strong, unsweetened, cooled
  • 2 tablespoons Amaretto di Saronno - or Marsala (optional)
  • 1 tablespoon sugar - to balance the coffee's bitterness

For the Topping:

  • 30g Unsweetened cocoa powder - high quality, sifted
  • 50g Dark chocolate 70% - for decorations (optional)
  • Fresh mint leaves - for garnish (optional)

Step-by-Step Preparation

Follow each step carefully for a professional result

Preparing tiramisu requires precision and patience. Each step is important to achieve the perfect consistency and the right balance of flavours.

1

Coffee Preparation (15 minutes before)

Prepare 300ml of strong espresso using a moka pot or espresso machine. The coffee should be of excellent quality, preferably a 100% arabica blend. Pour it into a shallow dish, add a tablespoon of sugar and, if desired, 2 tablespoons of liqueur. Allow it to cool completely - this is crucial to avoid melting the cream.

Coffee preparation for tiramisu

The coffee must be strong and completely cooled

💡 Pastry Chef's Tip: The coffee must be at room temperature. If it's too hot, the ladyfingers will fall apart and the cream will liquify.
2

Separating and Whisking the Eggs

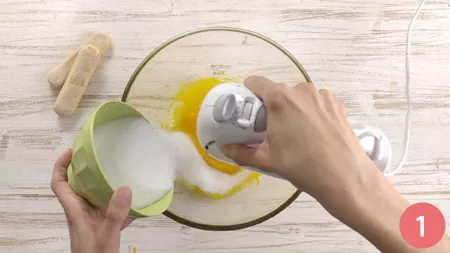
Carefully separate the yolks from the whites using two different bowls. Combine the yolks with 50g of sugar and whisk with an electric mixer for at least 10 minutes until you obtain a light, fluffy and foamy mixture. The cream should triple in volume and form a 'ribbon' when you lift the beaters.

Whisking yolks with sugar

The whisked yolks should be light and foamy

💡 Professional Technique: The eggs must be at room temperature. Whisk the yolks until, when lifting the beaters, the mixture falls in a ribbon that remains on the surface for several seconds.
3

Pasteurising the Eggs (Essential Step)

To pasteurise the eggs, make a syrup by bringing the remaining 50g of sugar with 2 tablespoons of water to 121°C. Use a kitchen thermometer to check the temperature. Pour the hot syrup in a thin stream over the whisked yolks, continuing to whisk for another 5 minutes until completely cooled.

Egg pasteurisation with sugar syrup

Pour the syrup in a stream whilst continuously whisking

💡 Food Safety: Pasteurisation eliminates any bacteria whilst maintaining creaminess. Temperatures: yolks at 60°C, whites at 70°C. This step is essential for food safety.
4

Preparing the Mascarpone Cream

The mascarpone must have been at room temperature for at least 30 minutes. Work it gently with a spatula to soften it, without whipping. Gradually incorporate the pasteurised yolks with movements from bottom to top. The cream must be smooth, glossy and without lumps. Don't use electric beaters at this stage to avoid breaking down the cream.

Incorporating mascarpone with the yolks

The cream must be smooth and homogeneous

💡 Consistency Secret: Work the mascarpone minimally. Too much working makes it runny. Incorporate the yolks with gentle movements from bottom to top.
5

Whipping and Folding in the Whites

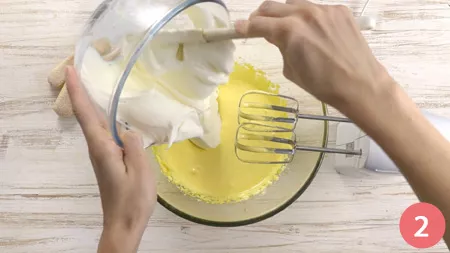
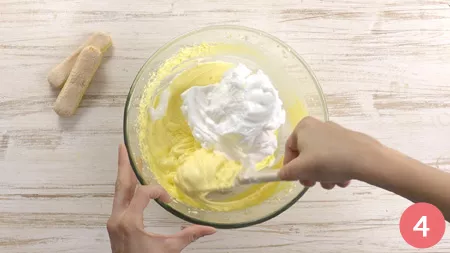
Whisk the whites to stiff peaks with a pinch of salt or a few drops of lemon. The whites are ready when, turning the bowl upside down, they don't move. Fold the whipped whites into the mascarpone cream in three portions, stirring gently from bottom to top with a spatula to avoid deflating them.

Stiffly beaten egg whites

Well-beaten whites guarantee lightness

💡 Trick for Lightness: The whites must be whipped to very stiff peaks. Fold them in gently to maintain the incorporated air that will give lightness to the cream.
6

Assembling the First Layer

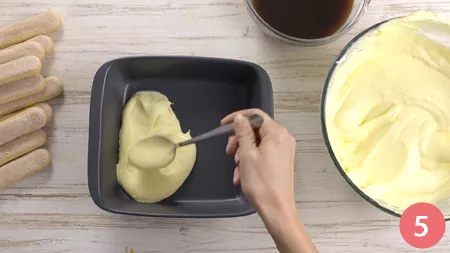
Quickly dip the ladyfingers in the coffee (1-2 seconds per side) and arrange them on the bottom of a 30x20cm dish. The biscuits should be moist but not sodden. Create an even layer without gaps. Spread half of the mascarpone cream levelling with a spatula. Dust lightly with sifted cocoa powder.

Arrangement of dipped ladyfingers

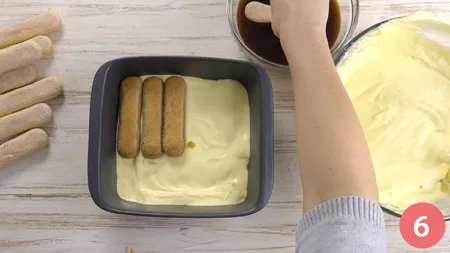
The ladyfingers must be arranged neatly

💡 Professional Technique: Dip only the base of the ladyfinger in the coffee. The top will absorb moisture from the cream. This prevents the tiramisu from becoming too wet.
7

Completing and Layering

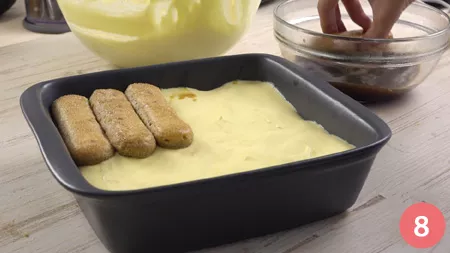
Repeat the process with a second layer of dipped ladyfingers and the remaining cream. Level the surface perfectly with an offset spatula. The surface must be completely smooth for an impeccable presentation. Cover with cling film directly on the surface to prevent a skin forming.

Levelling the final cream

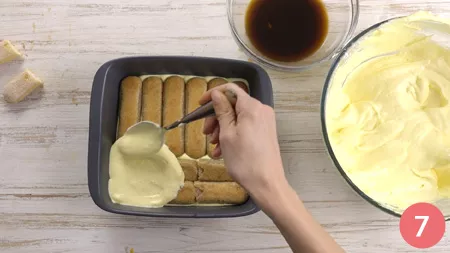
The surface must be perfectly smooth

💡 For a Perfect Presentation: Use an offset spatula to level. Tap the dish gently to eliminate air bubbles and compact the layers.
8

Chilling and Final Decoration

Place in the refrigerator for at least 4 hours, preferably overnight. During the chilling time, the flavours meld and the consistency becomes perfect. Before serving, dust generously with sifted cocoa powder using a fine sieve. For a gourmet touch, add dark chocolate shavings made with a vegetable peeler and fresh mint leaves.

Finished and decorated tiramisu

The tiramisu ready to serve

💡 Time is Crucial: 4 hours is the minimum, but after 12-24 hours the tiramisu reaches its peak of taste and consistency. Maturation is essential.

Popular Tiramisu Variations

Discover the most beloved interpretations of this classic

Strawberry Tiramisu 🍓

Spring variation with fresh strawberries and light cream. Perfect for warm months.

Pistachio Tiramisu 🥜

Gourmet version with Bronte DOP pistachio cream. An explosion of Sicilian flavours.

Limoncello Tiramisu 🍋

Fresh and citrusy, ideal as a summer pudding. Speciality from the Amalfi Coast.

Vegan Tiramisu 🌱

Without animal ingredients, with cashew cream and coconut milk.

Tips from Master Pastry Chefs

The secrets for a Michelin-starred restaurant tiramisu

🌡️ Ingredient Temperature

All ingredients must be at room temperature (20-22°C). Cold mascarpone creates lumps, cold eggs don't whip well.

☕ The Perfect Coffee

Use a 100% arabica blend medium roast. The coffee must be strong but not burnt. Never use instant or decaffeinated coffee.

🥚 Egg Freshness

Use only very fresh eggs (maximum 3 days old). Check the laying date on the shell. Old eggs won't whip properly.

⏰ Resting Times

Minimum 4 hours, ideally 12-24 hours. Tiramisu improves with time: the flavours meld and the consistency becomes perfect.

Frequently Asked Questions about Tiramisu

Expert answers to the most common questions

The name 'Tiramisu' derives from the Treviso dialect 'Tireme sù' which means 'Pick me up', referring to the dessert's energising properties. Coffee provides caffeine, sugar immediate energy, and eggs protein. It was originally served as a restorative and natural aphrodisiac in Venetian tolerance houses.

Tiramisu keeps in the refrigerator at 4°C for maximum 3 days, covered with cling film. It cannot be frozen because the mascarpone separates. After 24 hours it reaches its flavour peak, on the third day it begins to lose consistency. Never leave it at room temperature for more than 2 hours.

Yes, there are three safe alternatives: 1) Pasteurise the eggs with sugar syrup at 121°C as explained in the recipe; 2) Use ready pasteurised eggs; 3) Make a version with whipped cream instead of eggs. Pasteurisation is the method preferred by professionals because it maintains the original taste.

Ladyfingers are thicker and absorb more coffee, creating a moister and more structured tiramisu. Pavesini are thinner and more delicate, need quick dipping (1 second) and create a lighter tiramisu. Ladyfingers are the traditional choice, Pavesini a modern variation appreciated for their lightness.

A standard portion (100g) contains about 350-400 calories. Tiramisu is an energy-rich dessert: 45% fat (mascarpone), 35% carbohydrates (ladyfingers and sugar), 20% protein (eggs). One portion provides 18% of daily caloric needs. Light versions exist but compromise the traditional taste.

Absolutely yes, it's actually recommended! Tiramisu improves with resting: prepare it 12-24 hours before serving. The flavours meld, the consistency becomes perfect, and the coffee is absorbed evenly. It's the ideal dessert for important dinners precisely because it must be prepared in advance.

Nutritional Information

Values per portion (100g)

Calories 385 kcal
Proteins 7.5 g
Carbohydrates 32 g
Fats 25 g
Fibre 1.2 g
Sugars 28 g
Sodium 95 mg
Caffeine 65 mg

The information presented is for informational purposes only. For allergies or intolerances always check the specific ingredients used.